Brat Scrapbook Ideas: Layouts, Supplies and Page Structure
A scrapbook page works when it has a structure: one focal point, a clear story and some space. This guide gives layouts and supplies for pages that use bold lowercase text headings made with the free Brat Text Generator.
Pick a page story
Decide what the page is about before cutting anything: a trip, a friendship, a season. One page, one story. List three to five photos that tell it and set the rest aside.
Three layouts
| Layout | Best for | How it works |
|---|---|---|
| Hero photo | A single strong picture | One large photo, a title strip and a short caption |
| Grid | Several similar photos | 2 by 2 or 3 by 3 with equal gaps |
| Timeline | A sequence | Photos along a strip with date labels |
Making the text elements
- Type a short title, such as “summer 2026”, into the generator.
- Export at a size that prints around 8 cm wide.
- Print on photo paper or matte card, then cut it out with a trimmer.
- Use the same colors for date labels. The colors guide lists tested pairs.
Keep text to a title and one caption per page.
Supplies
- Acid-free paper and photo corners or tape, which protect photos long term.
- A paper trimmer and a pair of scissors.
- Photo-safe adhesive.
- A fine-tip pen for journaling.
Page checklist
- Leave at least 1 cm margin around the edges.
- Keep to two colors plus black and white.
- Print photos at consistent sizes.
- Write names and dates on the back of photos.
Digital option
To make a digital scrapbook, arrange images in a document and export as a PDF.
Keep the personal touch
Memories matter more than polish. A short handwritten caption beats a long printed one.
Building a themed chapter
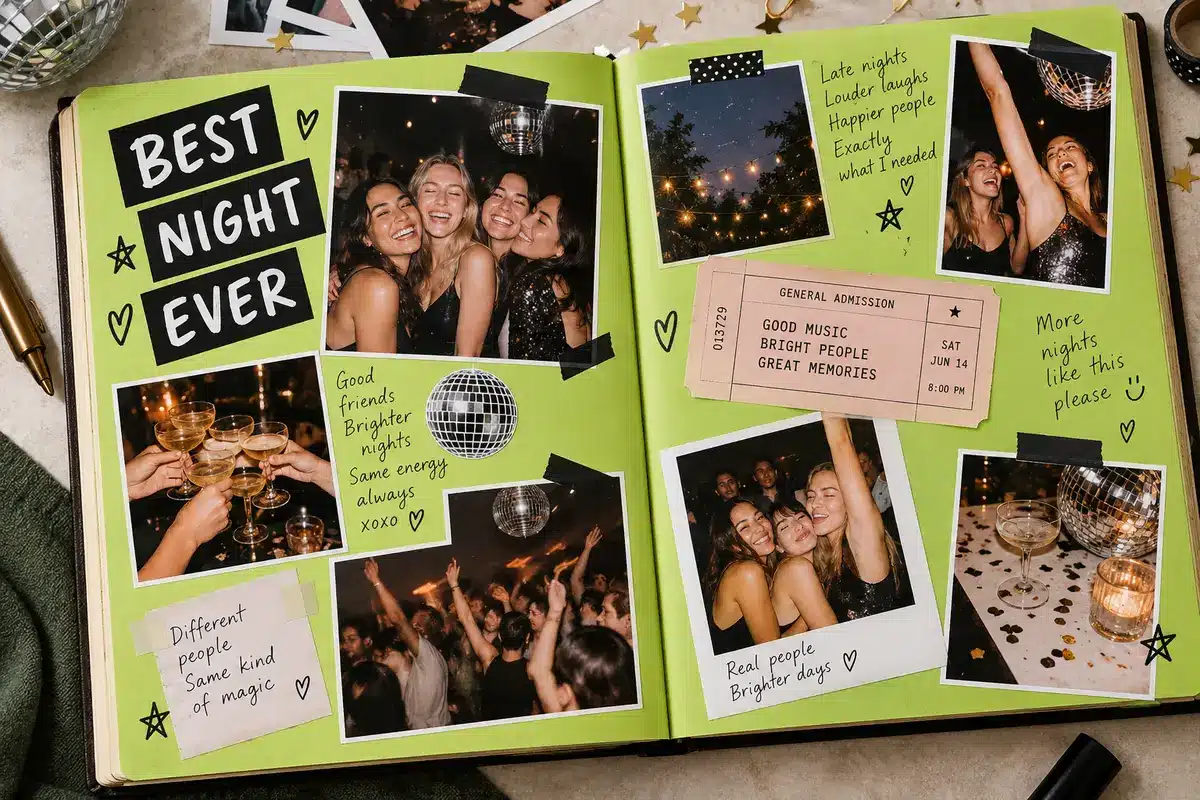
A scrapbook reads better in chapters. Pick a theme such as a trip, a season or a friendship and give it a title page printed with a single bold word. Follow it with two to four photo pages, then a page with tickets, notes or small keepsakes. Repeating the same title style makes the album feel designed.
Journaling prompts
Write a date, a place and one sentence about why the photo matters. Short, specific notes age better than long ones.
A worked example: a weekend trip page
Pick five photos from a weekend away. Choose a hero photo for the top left, make a headline “two days, no plans” in the generator at 8 cm wide, and place it across the top of an A4 page. Put the other four photos in a grid underneath, each with a handwritten caption of five words. Leave a 1 cm margin. The page tells the story in a glance.
Troubleshooting
| Problem | Fix |
|---|---|
| Page looks crowded | Remove one photo |
| Photos curl after gluing | Use photo-safe tape or corners |
| Headline is lost | Print it larger or use contrasting paper |
| Colors clash | Limit to two colors plus neutrals |
Preserving memories
Use acid-free materials and store pages away from heat and humidity. Write dates and names on the back of photos in pencil.
Digital backups
Photograph or scan each finished page. If the album is damaged, you still have the layout and captions.
Choosing paper and glue for a scrapbook page
Matte paper between 160 and 200 gsm takes ink without curling, while glossy photo paper can smear a glue stick. If you print the lime green as a background, expect it to look darker than on screen, so print one test square before committing a full page. Photo corners or removable adhesive let you swap pictures later without tearing the page. Keep the album away from windows, because sunlight fades both ink and photos over months.
Layout ideas for a green memory page
- One large lowercase title across the top with photos in a three-column grid below it.
- A single full-bleed green page between chapters, with only one word on it, to act as a divider.
- A caption strip along the bottom edge of each photo, printed on lighter paper so handwriting stays readable.
Why scrapbooking suits this style
Scrapbook pages love contrast and clear focal points, which suits a flat green and black look. One strong word on a page, surrounded by photos and small notes, creates a rhythm that holds attention.
A page layout step by step
- Print a title strip with the Brat Text Generator on matte paper.
- Mount it near the top of the page.
- Arrange photos in a simple grid underneath.
- Add a caption strip under each photo.
- Place small keepsakes, such as tickets, in a pocket or envelope.
Supplies worth buying
Acid-free paper and photo-safe adhesive protect photos over time. A paper trimmer gives clean edges, and a corner punch makes rounded corners that resist wear.
Storing the finished book
Store albums upright in a cool, dry place away from sunlight. Slip a sheet of tissue between pages if the prints are glossy to prevent them sticking to each other.
Digital alternatives
If you prefer a digital scrapbook, assemble pages in a slide or document editor and export them as images or a PDF. You can print them later as a photo book. Keep all the original photos in a folder so the project is easy to edit.
Frequently asked questions
How many photos per page?
Three to five.
Can I laminate?
Avoid it for photos, since it traps moisture. See the bookmark guide for laminating paper projects.
How many pages should I make?
A page per trip or event is a manageable pace.
Can I print the headline at home?
Yes, on matte photo paper.
Will the green print the same as on screen?
Not exactly. Printers use different inks from screens, so run a test print and adjust brightness slightly if the green looks muddy.
How do I keep a page from curling?
Use heavier paper, apply glue evenly to the edges and centre, and press the page flat under a heavy book overnight.
Brat Generator is an independent tool and is not affiliated with, endorsed by, or sponsored by Charli XCX, her record label, or any related brand. Any album or trademark names are mentioned only to describe a visual style.